ADVERTISEMENT
Variations
The beauty of this recipe lies in its adaptability. For a different flavor profile, feel free to experiment with the nut butter. Almond butter or sunflower seed butter are excellent alternatives that work wonderfully. You can also replace the honey with pure maple syrup or even agave nectar to keep the recipe entirely vegan-friendly.
The add-ins are also completely customizable. While chocolate chips and nuts are a classic combination, don’t be afraid to get creative.
Try incorporating other mix-ins like shredded coconut, dried cranberries or raisins, or even a tablespoon of chia seeds or flaxseed for an extra nutritional boost. A sprinkle of cinnamon or a dash of espresso powder can also be added to the wet mixture for a more complex flavor.
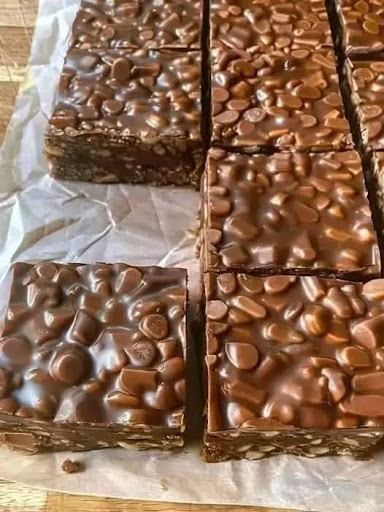
For a truly decadent treat, consider a chocolate coating. Once the bars are set and cut, you can melt additional chocolate chips and briefly dip each bar halfway, letting the chocolate harden on a fresh piece of parchment paper.
This creates a beautiful, professional-looking finish and an extra layer of rich chocolate flavor that elevates the bars to a new level of indulgence.
Tips
To achieve the perfect bar texture, the most important step is pressing the mixture firmly and evenly into the pan. Don’t be gentle; use the flat bottom of a measuring cup or a sturdy spatula to compact the mixture as much as possible. This prevents the bars from crumbling when you cut and eat them.
If you find your mixture isn’t sticking together well, it’s often because the binding mixture needs to be slightly warmer or more abundant.
Gently rewarm the peanut butter and honey mixture and add an extra tablespoon of peanut butter to help bind everything more effectively. The warmth is key to slightly melting the chocolate chips, which also acts as a glue.
For clean, professional-looking cuts, make sure the bars are completely chilled and firm. Use a sharp knife and wipe it clean with a warm, damp cloth between each cut.
For perfectly uniform squares, you can even score the surface lightly with a knife before fully chilling, then follow the score lines for the final cut once firm.
How to Store
Proper storage is key to maintaining the perfect texture of your no-bake crunch bars. Due to the honey and peanut butter, these bars are best kept refrigerated.
Store them in an airtight container separated by layers of parchment paper to prevent them from sticking together. They will remain firm and fresh for up to two weeks when chilled.
While refrigeration is recommended, you can also store them at room temperature for a shorter period, typically up to three or four days.
Be aware that in a warmer environment, the bars will become much softer and may lose their structural integrity. Always keep them in a cool, dry place away from direct sunlight.
For long-term storage, these bars freeze exceptionally well. Individually wrap each bar in plastic wrap and then place them all in a large freezer-safe bag or container.
They can be frozen for up to three months. When you’re ready to enjoy one, simply let it thaw in the refrigerator or at room temperature for about 15 minutes.
Conclusion
These No-Bake Homemade Crunch Bars truly are the epitome of a simple, no-fuss treat that delivers maximum satisfaction. They offer a wonderful harmony of chewy oats, crispy cereal, rich chocolate, and salty-sweet peanut butter in every single bite. Their ease and speed of preparation make them a reliable go-to for any occasion.
We encourage you to make this recipe your own. Experiment with different nut butters, seeds, and dried fruits to discover your family’s favorite combination. Once you experience how simple and delicious homemade snack bars can be, you may never reach for a store-bought granola bar again. Happy no-baking
ADVERTISEMENT
